Developer Install Using Docker Compose
Introduction
This page is focused on installing a developer version of Diffgram for local testing and validation purposes.
- For Production see Production.
- For Contributing see New Engineer Welcome.
Getting Ready
This uses Docker Compose.
- Install Docker and docker-compose if not already installed.
- Verify that the Docker container service is up and running.
- Set up your BLOB Storage service.
Set up your Storage
We recommend setting up your storage prior to running the installer. There are 4 storage options, AWS, Azure, GCP Storage Providers List and MinIO.
The installer will test your storage connection.
Install
Call python install.py and follow the prompts. It handles configuring your environment file and calls the needed docker commands.
In summary, you can copy and paste this and follow the prompts.
git clone https://github.com/diffgram/diffgram.git
cd diffgram
pip install -r requirements.txt
python install.py
Access the Install on Port 8085
Go to http://localhost:8085
View the docker UI to see service statuses.
Access on Port 8085
Note that viewing on port 8081 or other ports may cause unexpected issues and errors.
More Info
Additional info.
Screenshot Examples
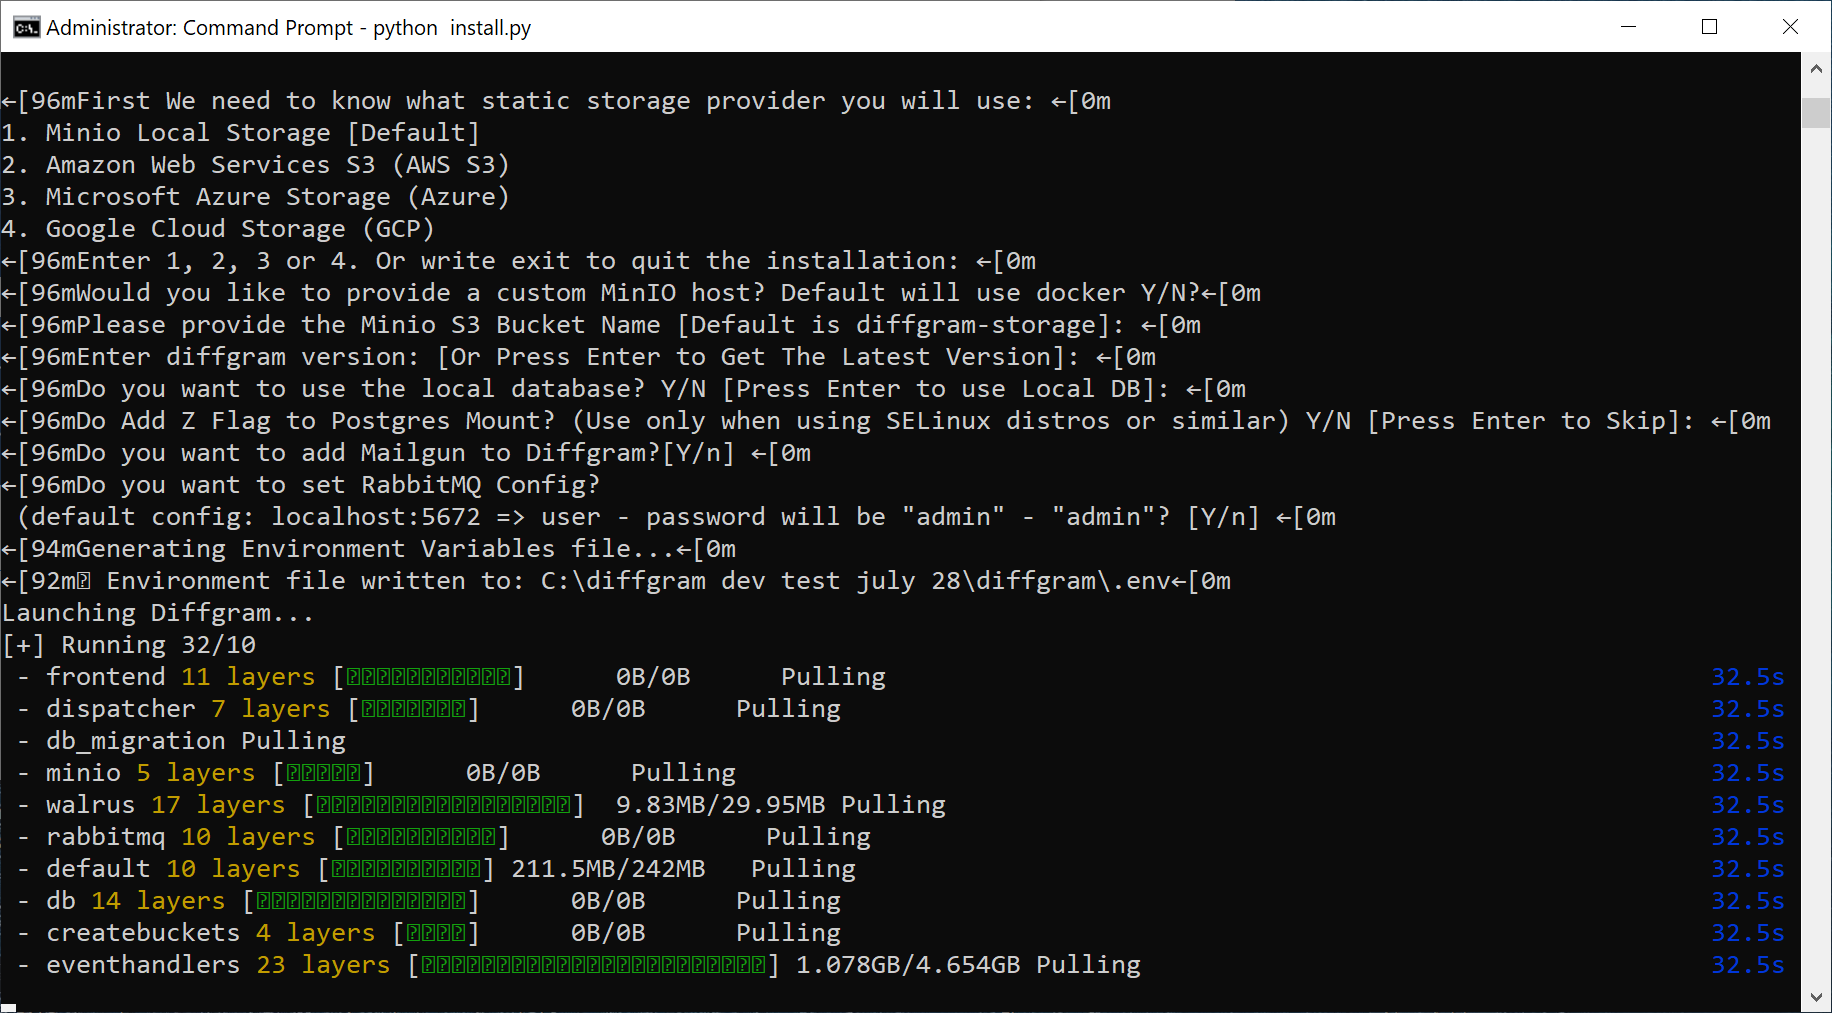
Install.py example

Example of Docker up and running in Windows

Docker Compose Install Considerations
The default dev docker configuration does not store data in a durable way. The database and storage may both be deleted with the image is deleted. It is not a production web server. See Production installation. For a more durable dev installation, you may also configure a separate database and storage setup.
Mental Prep
Depending on multiple factors your install time will vary. In the absolute best case if you have your storage and docker already setup, and there are no surprises, it is fast. If you need to setup new hardware, new storage, credentials etc. it will take more time.
Diffgram is a system designed for scale. This means there is a little bit more configuration. It is quite normal for the install and initial setup to be the most difficult part.
A few things that take time:
- Storage configuration and permissions
- Setting up hardware resources (e.g. if running on cloud)
- Admin account and project setup
- Setting up stuff within Diffgram itself (e.g. connections, schema etc)
- Ecosystem, like SDK etc.
We are always looking to improve the install process and welcome ideas!
Debugging
Config
Please note that we provide the various config mechanisms e.g. docker-compose, helm chart, etc. with the intent that in most cases that config will work well out of the box.
If there are any changes required, then it is quite possible it will "break" the config. While we can do our best to help please keep that mind. For example if you use custom ingress rules, custom TLS, use some parts on docker-compose and some not etc. We welcome ideas to build into the default config templates.
If getting help please be sure to mention anything that is non-standard, and if possible provide the complete customized new config.
Dev Install is Not for Enterprise.
Please contact sales for Enterprise.
Warnings
The docker compose dev setup is not for Production.
Because the Database may be deleted if the image is deleted! And it does not include a production server like Gunicorn. See Kubernetes setup for Production installation.
Stopped Containers
diffgram-db_migration
diffgram-createbuckets
Are expected to stop upon completion.
These processes set up the latest database state and create the default buckets, therefore they exit once complete.
Known Install Issues
You may need to restart services.
Windows Specific
Requires Elevated Permissions
Use Run as Administrator. This is becuase of
aws boto3not diffgram itself.
Temproary Database
After the installation, you will see a folder called postgres-data was created. This is where all the SQL data from the postgres database will be. Make sure to avoid deleting this folder, unless you want to completely delete the data inside diffgram.
Backend storage vs Connections
The "backend" storage that's set at installation time is different from "connections". The backend storage is where the system stores and read BLOB data. It is assumed to be singular and static. (Excluding ML bucket.). Where as the Connections is assumed to be many and easily editable.
In the case where you already have data in a designated bucket, then it should be used as a connection, and a new bucket created as the backend.
Contributor Install
Bare metal installation
You can also spin up each of the services and use your own dispatcher.
Need help?
Join our Community.
Updated over 2 years ago