Annotate
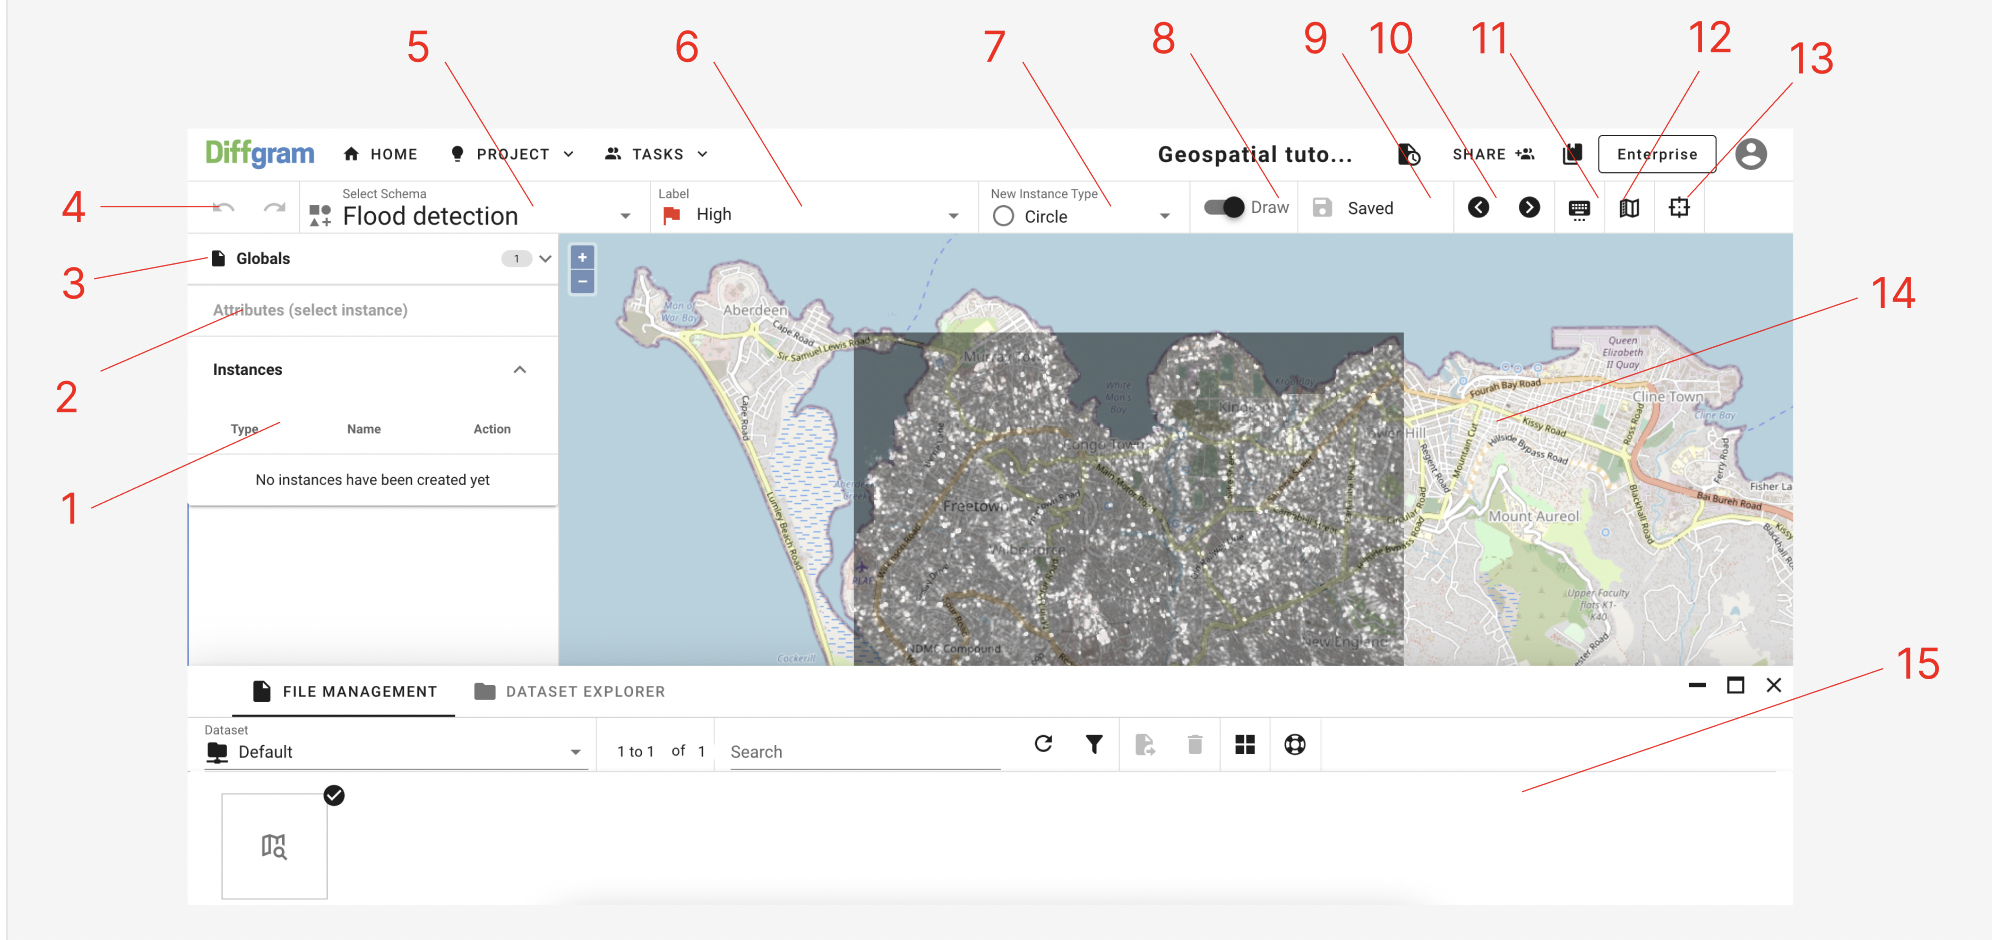
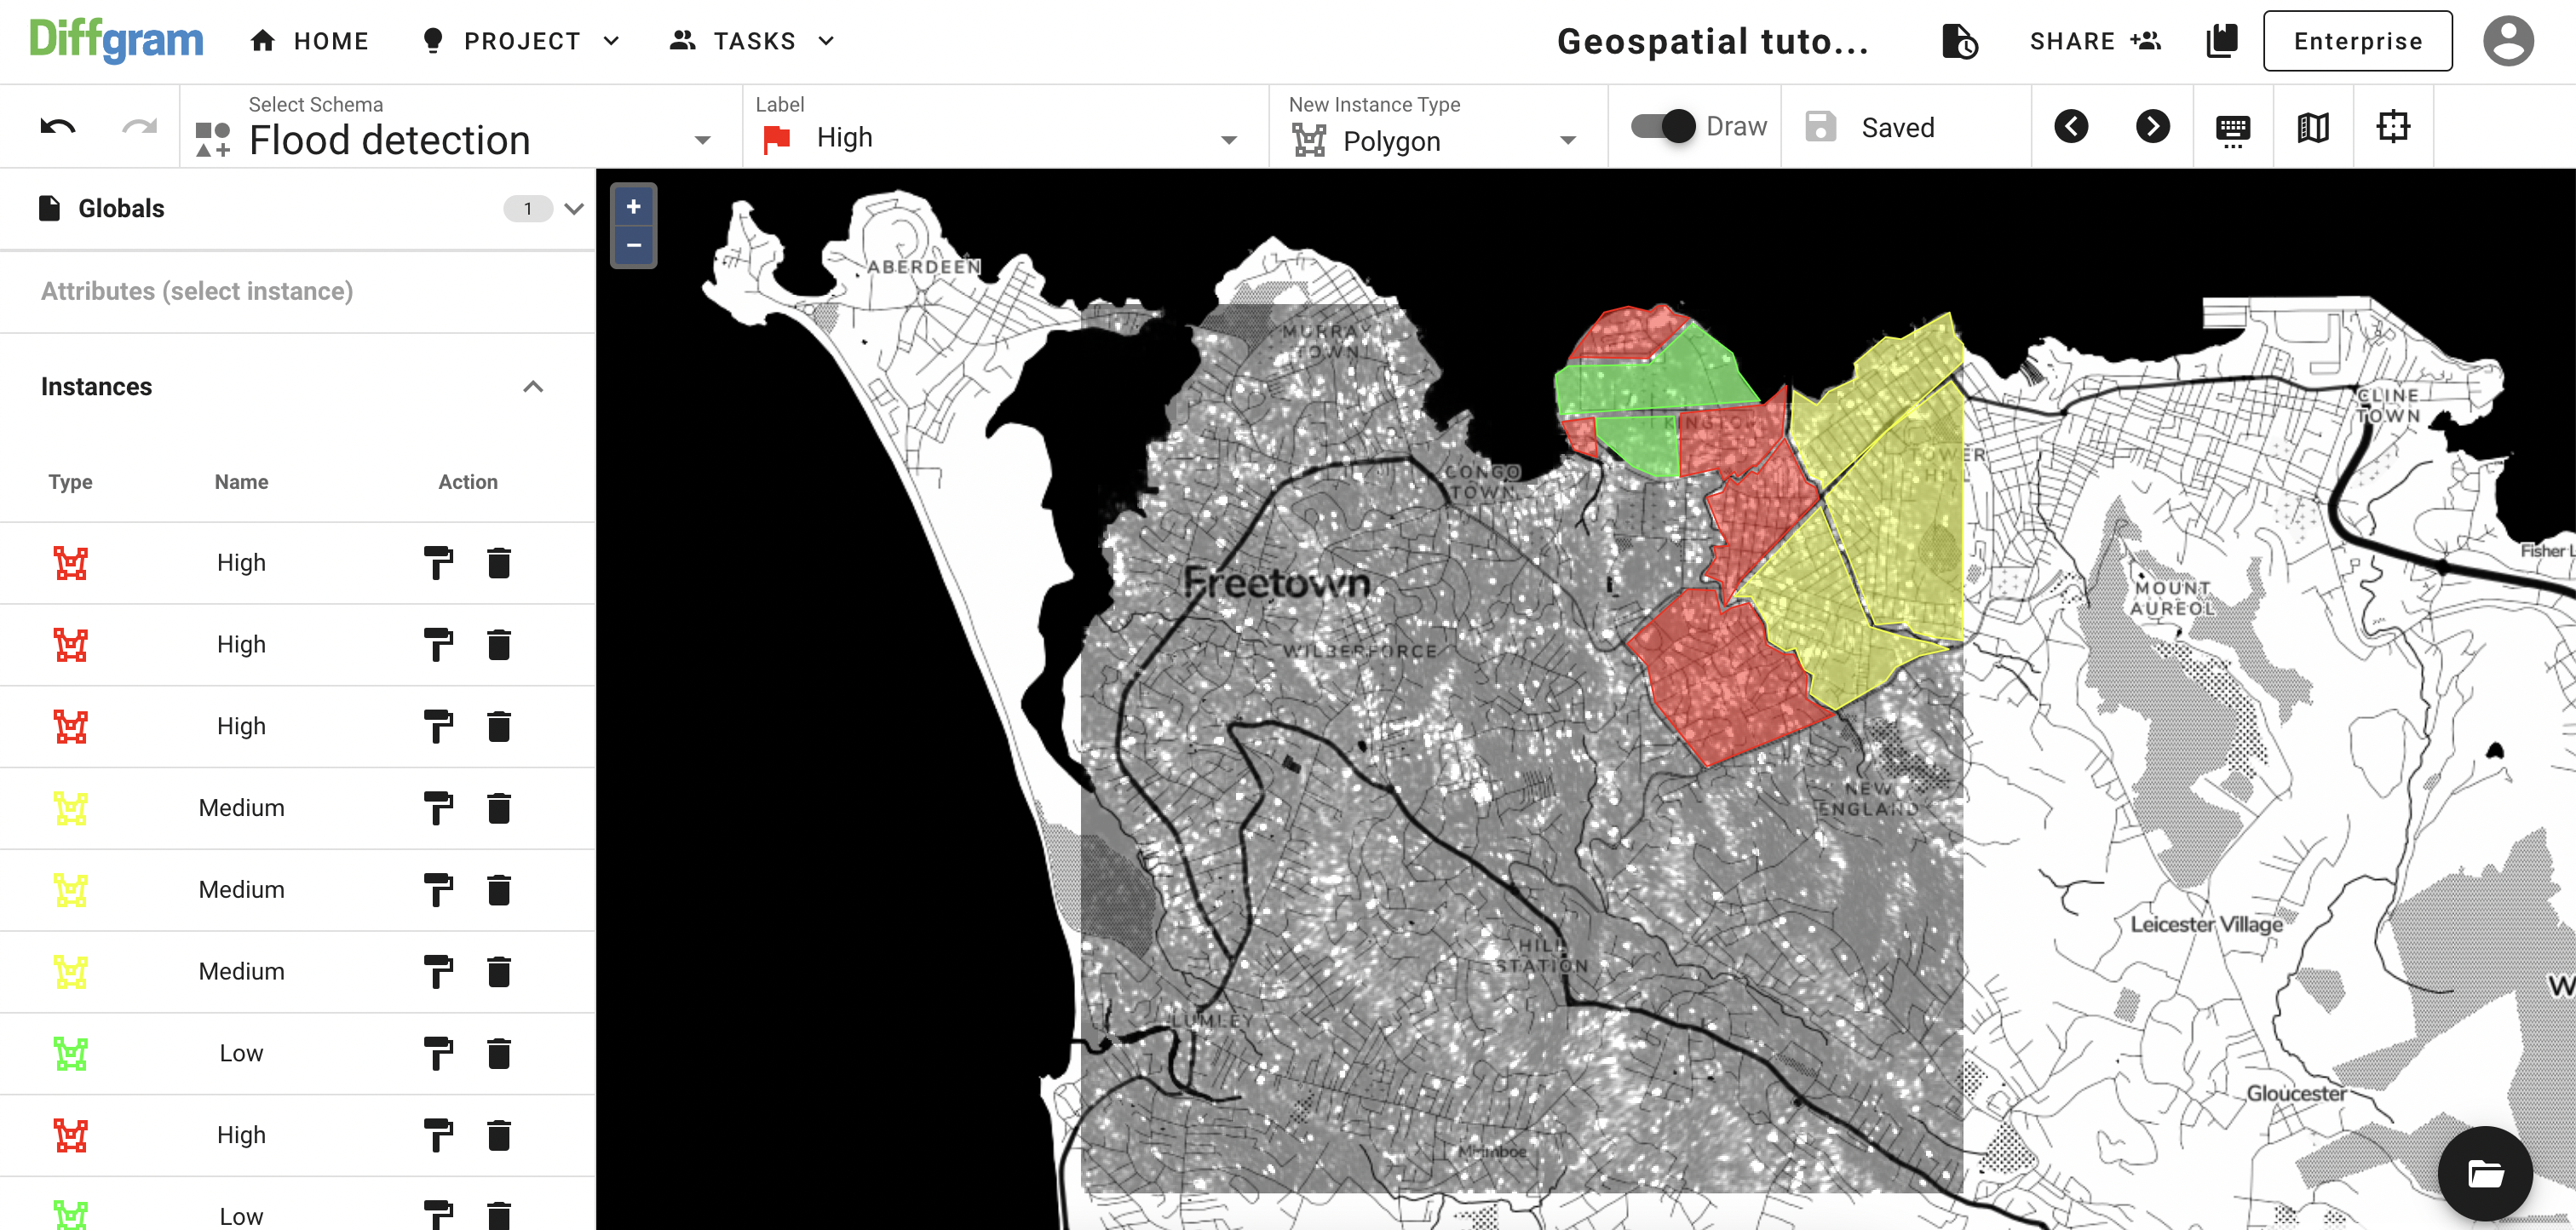
Geospatial Interface UI
- Created annotations
- Attributes
- Global Attributes
- Undo/Redo
- Current schema
- Current Label
- Current primitive
- Draw/Edit mode
- Save Status
- Next File/Previous File
- Hotkeys
- Map Settings
- Reset Default View
- Annotation area
- File manager
Annotating
To go to the annotation UI, click Project > Studio
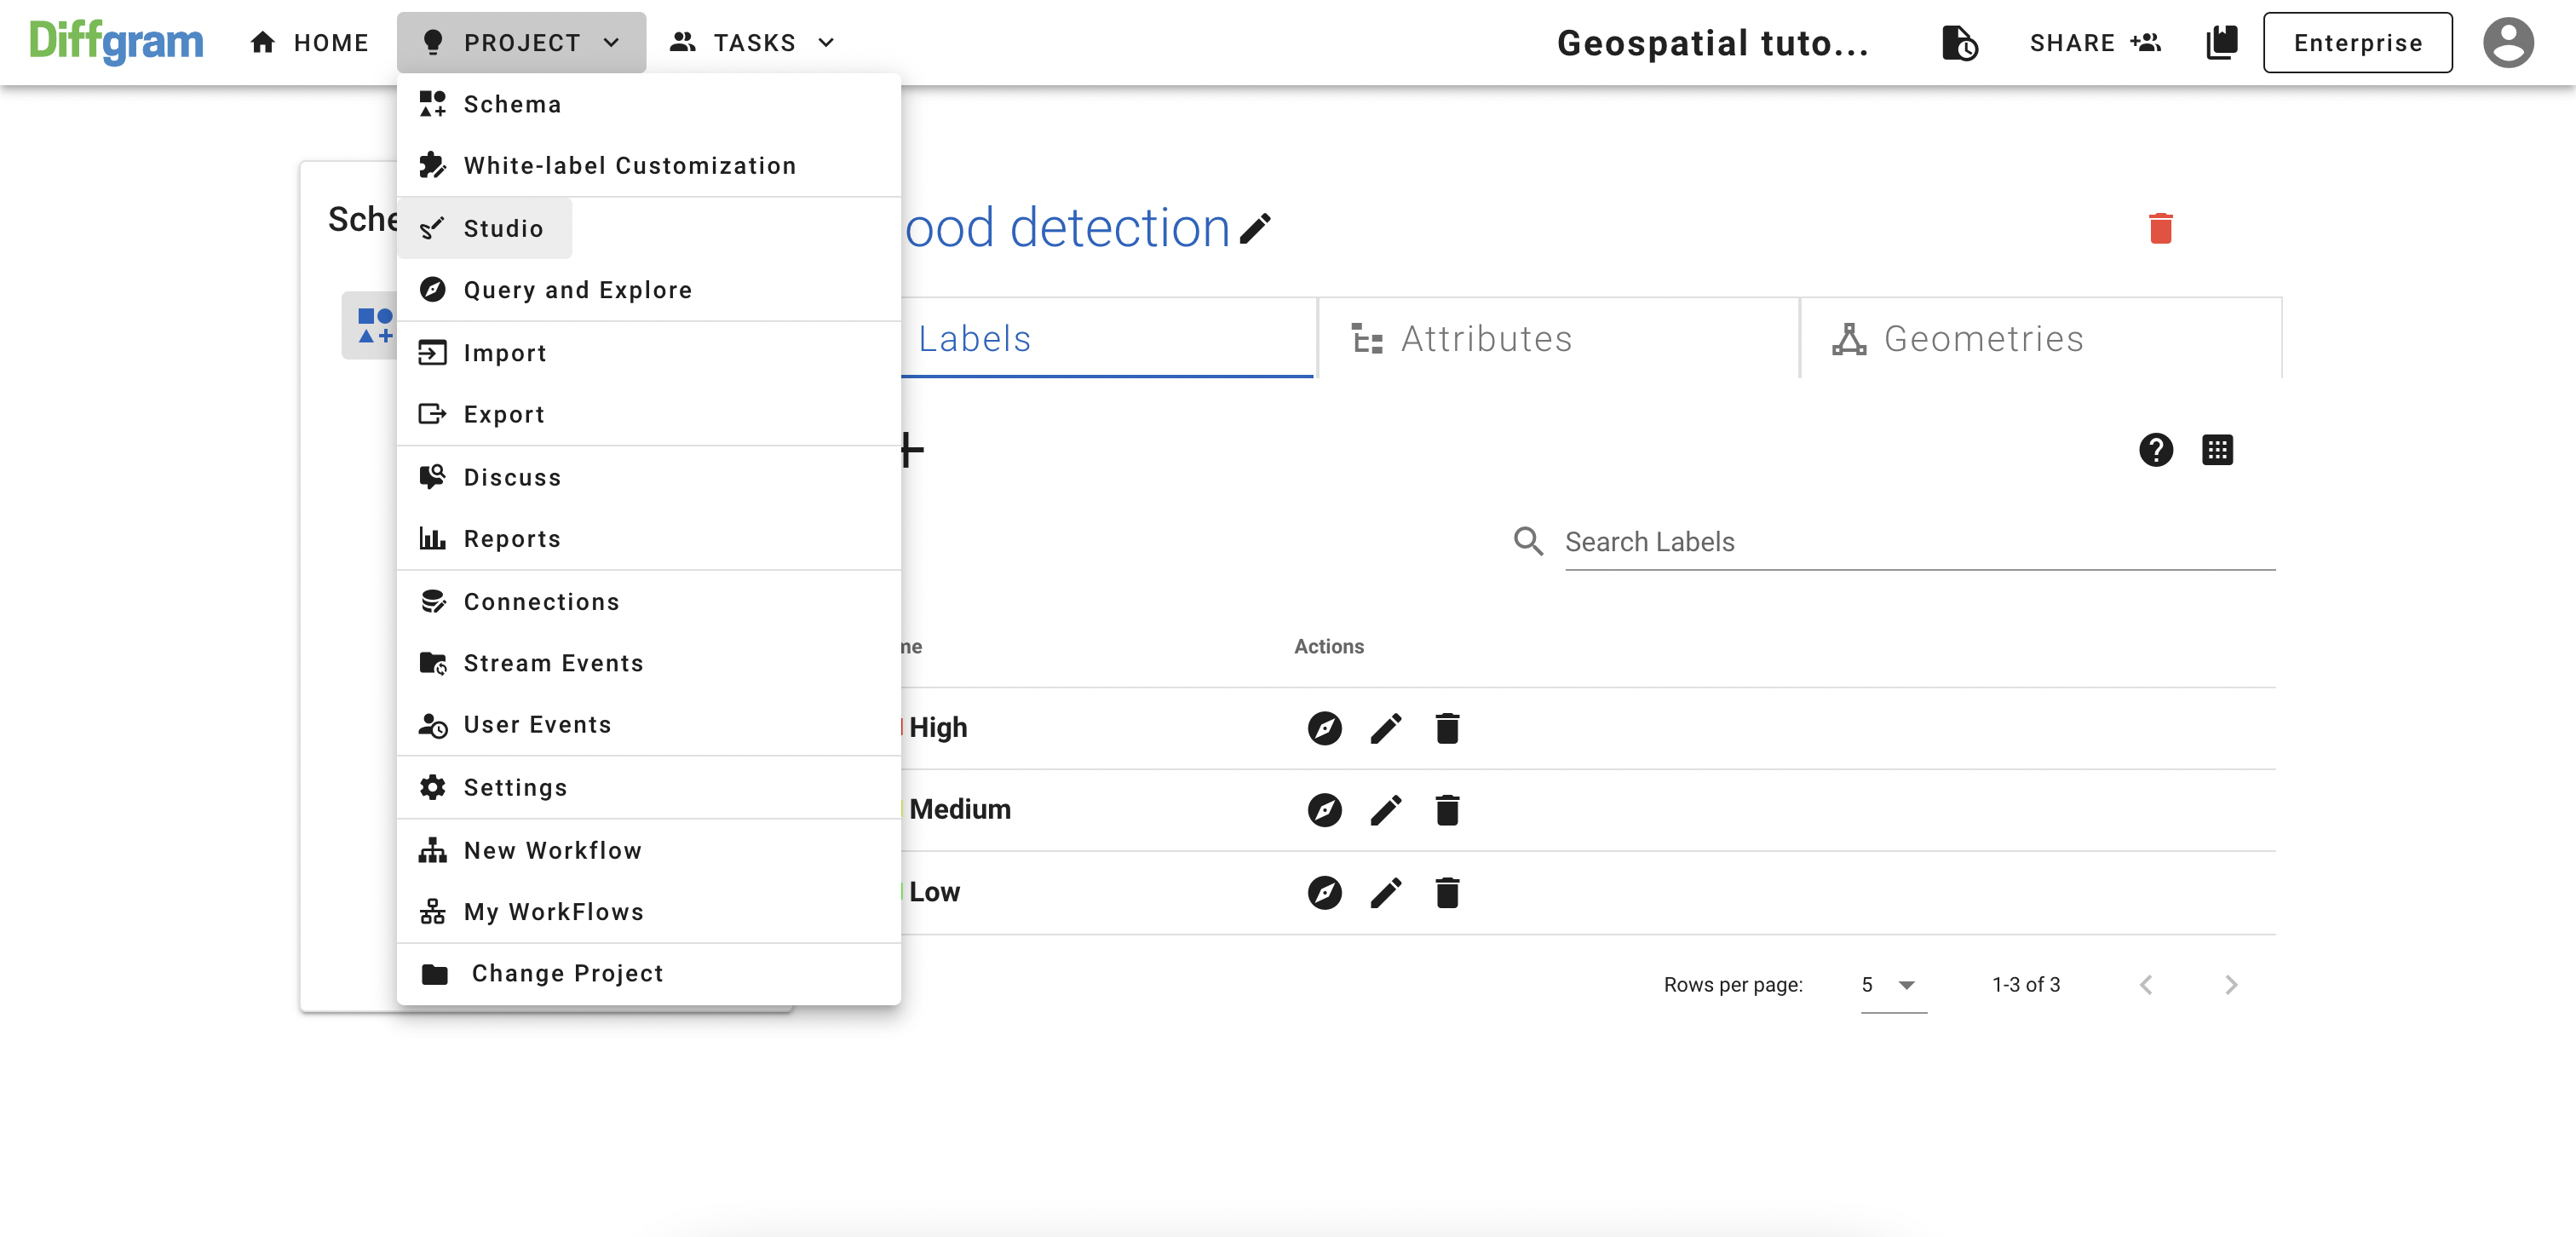
After you should see a screen like this:
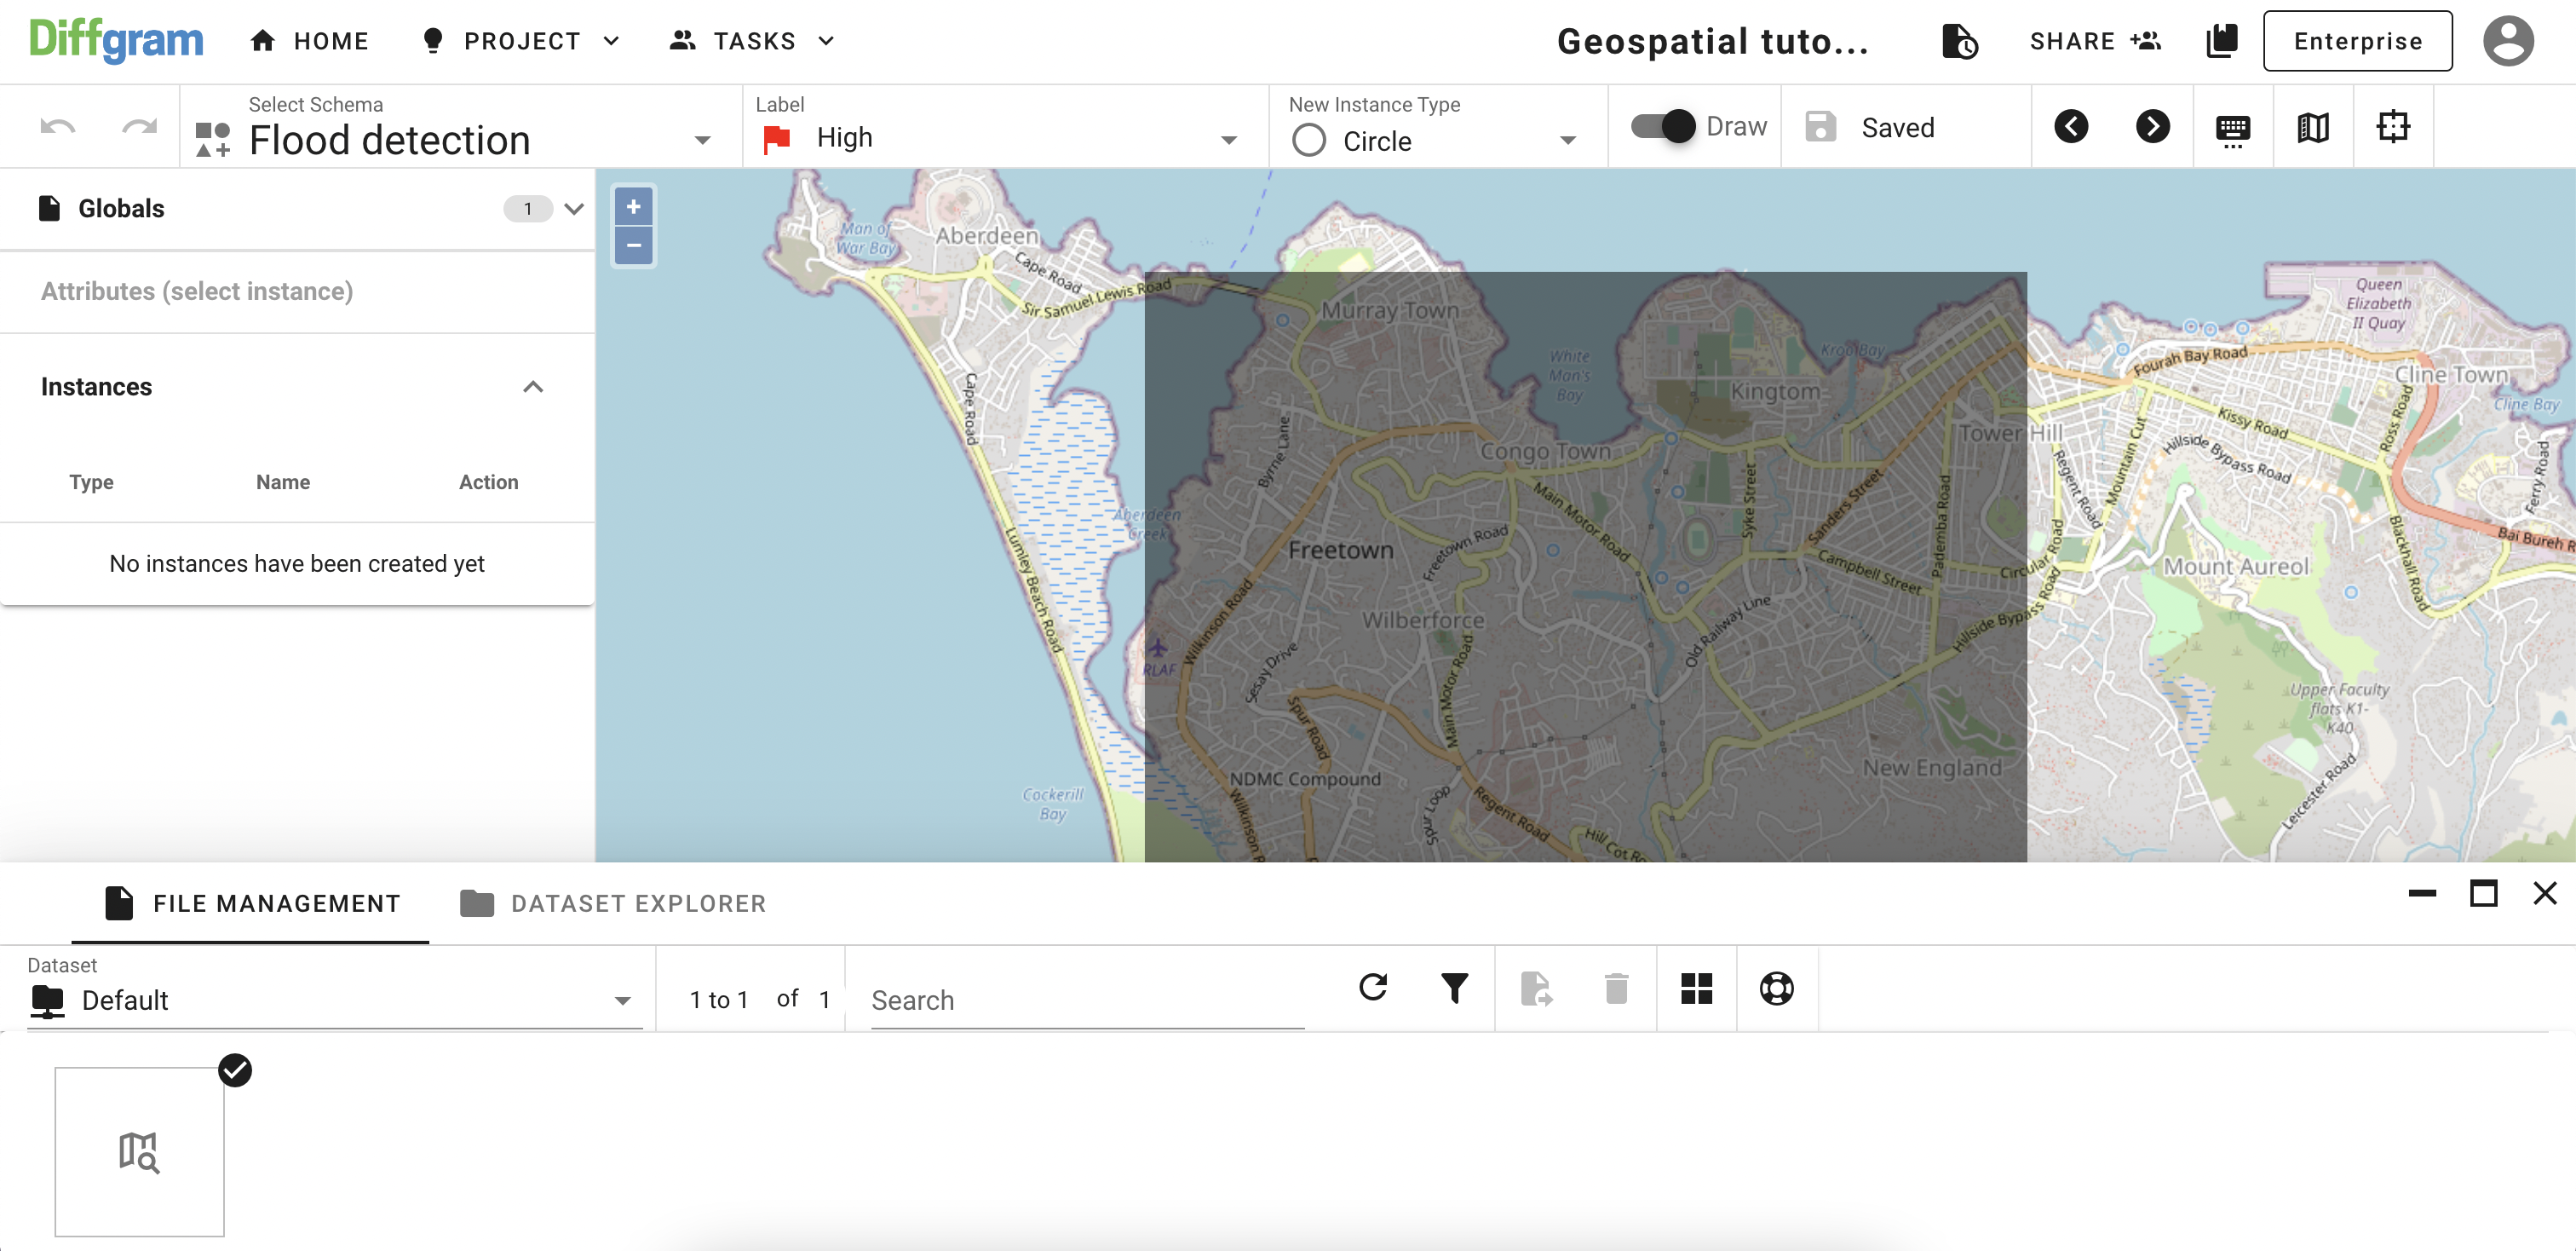
As you see, the file is not rendered correctly. To fix that, we need to open Map Settings and turn off normalization and interpolation. After that is done, you should be able your file rendered correctly:
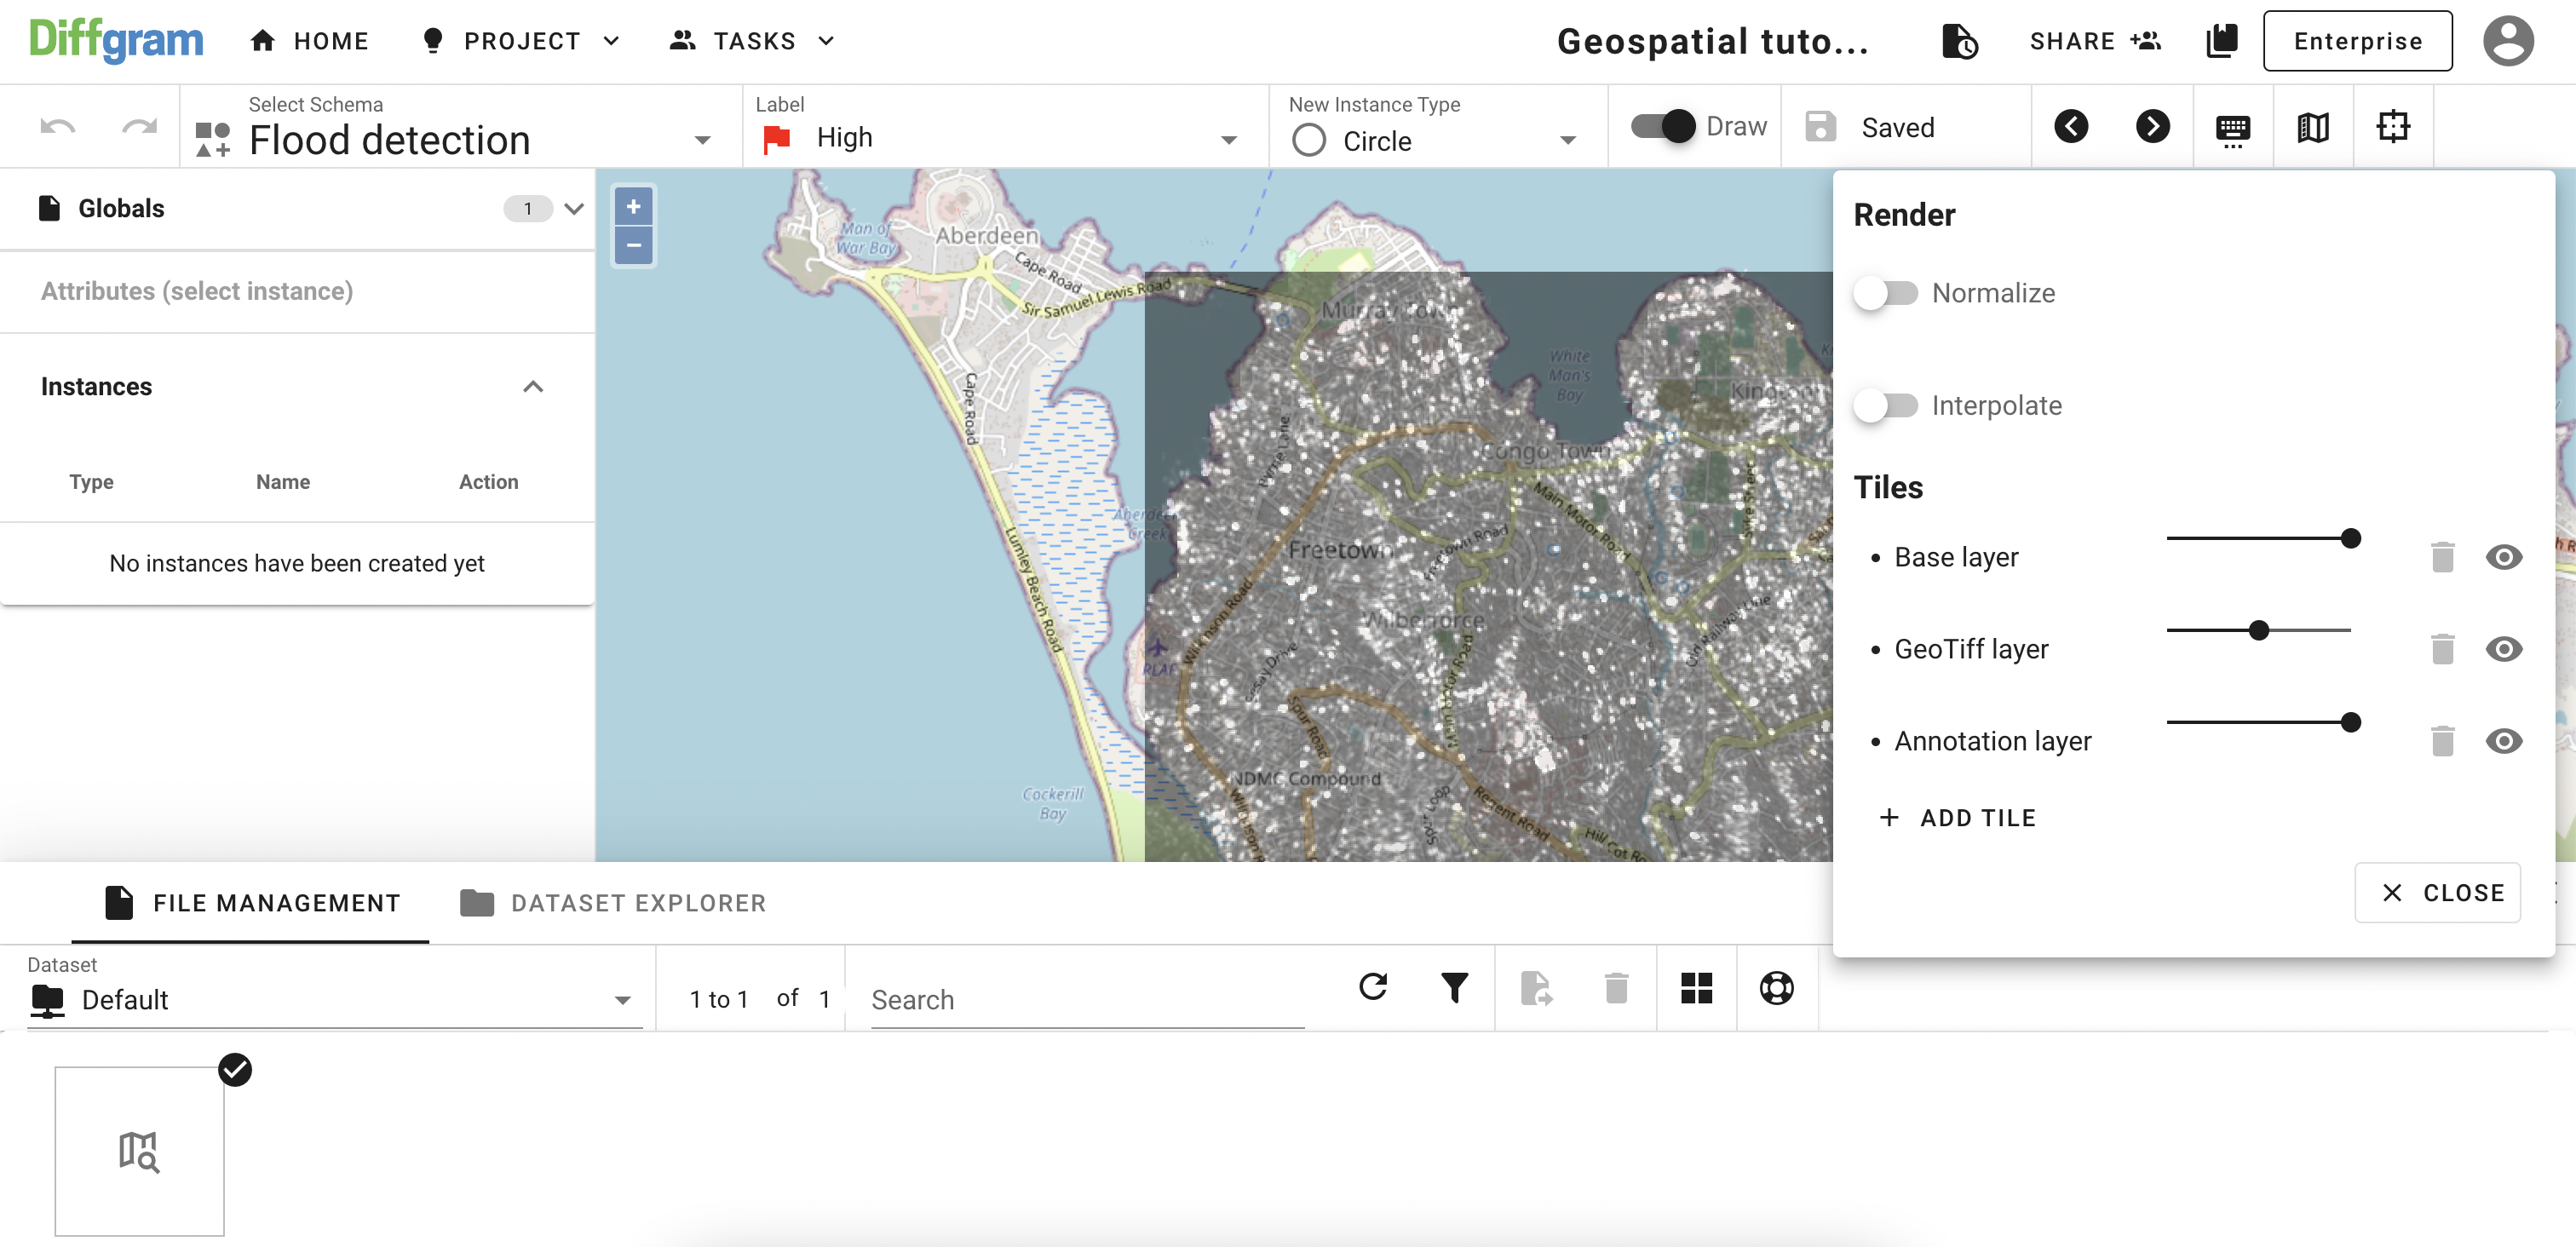
To make annotation a bit more comfortable, I'll add toner map tile to our interface. For this, open Map Settings one more time and click ADD TILE, and then you should see:
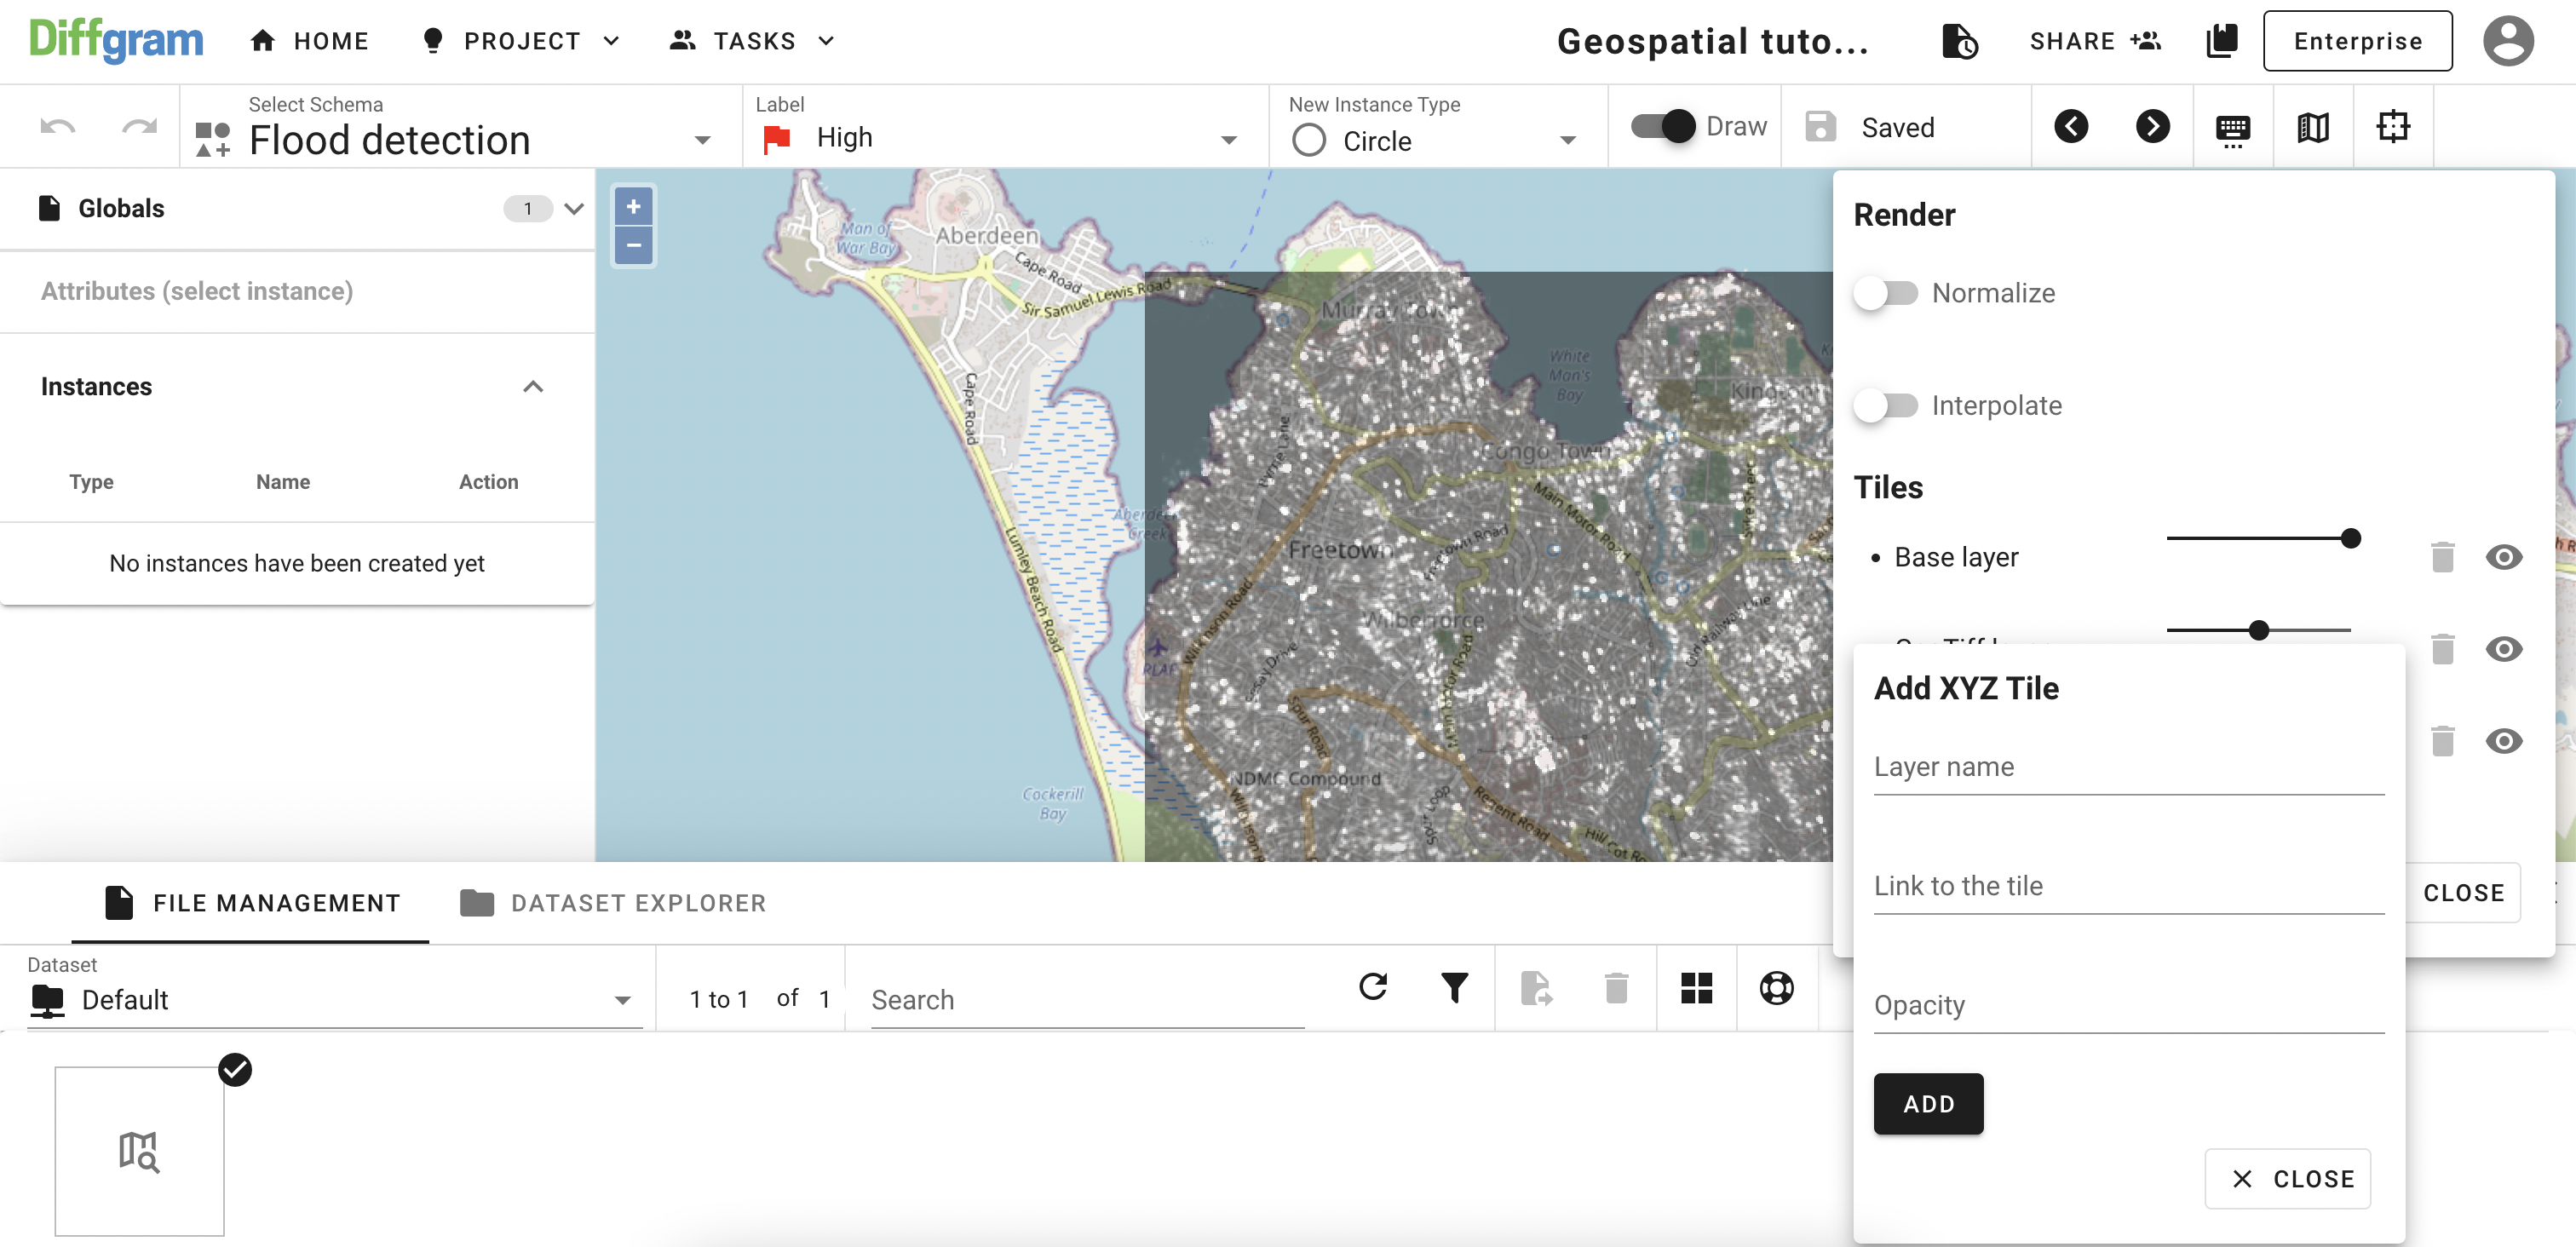
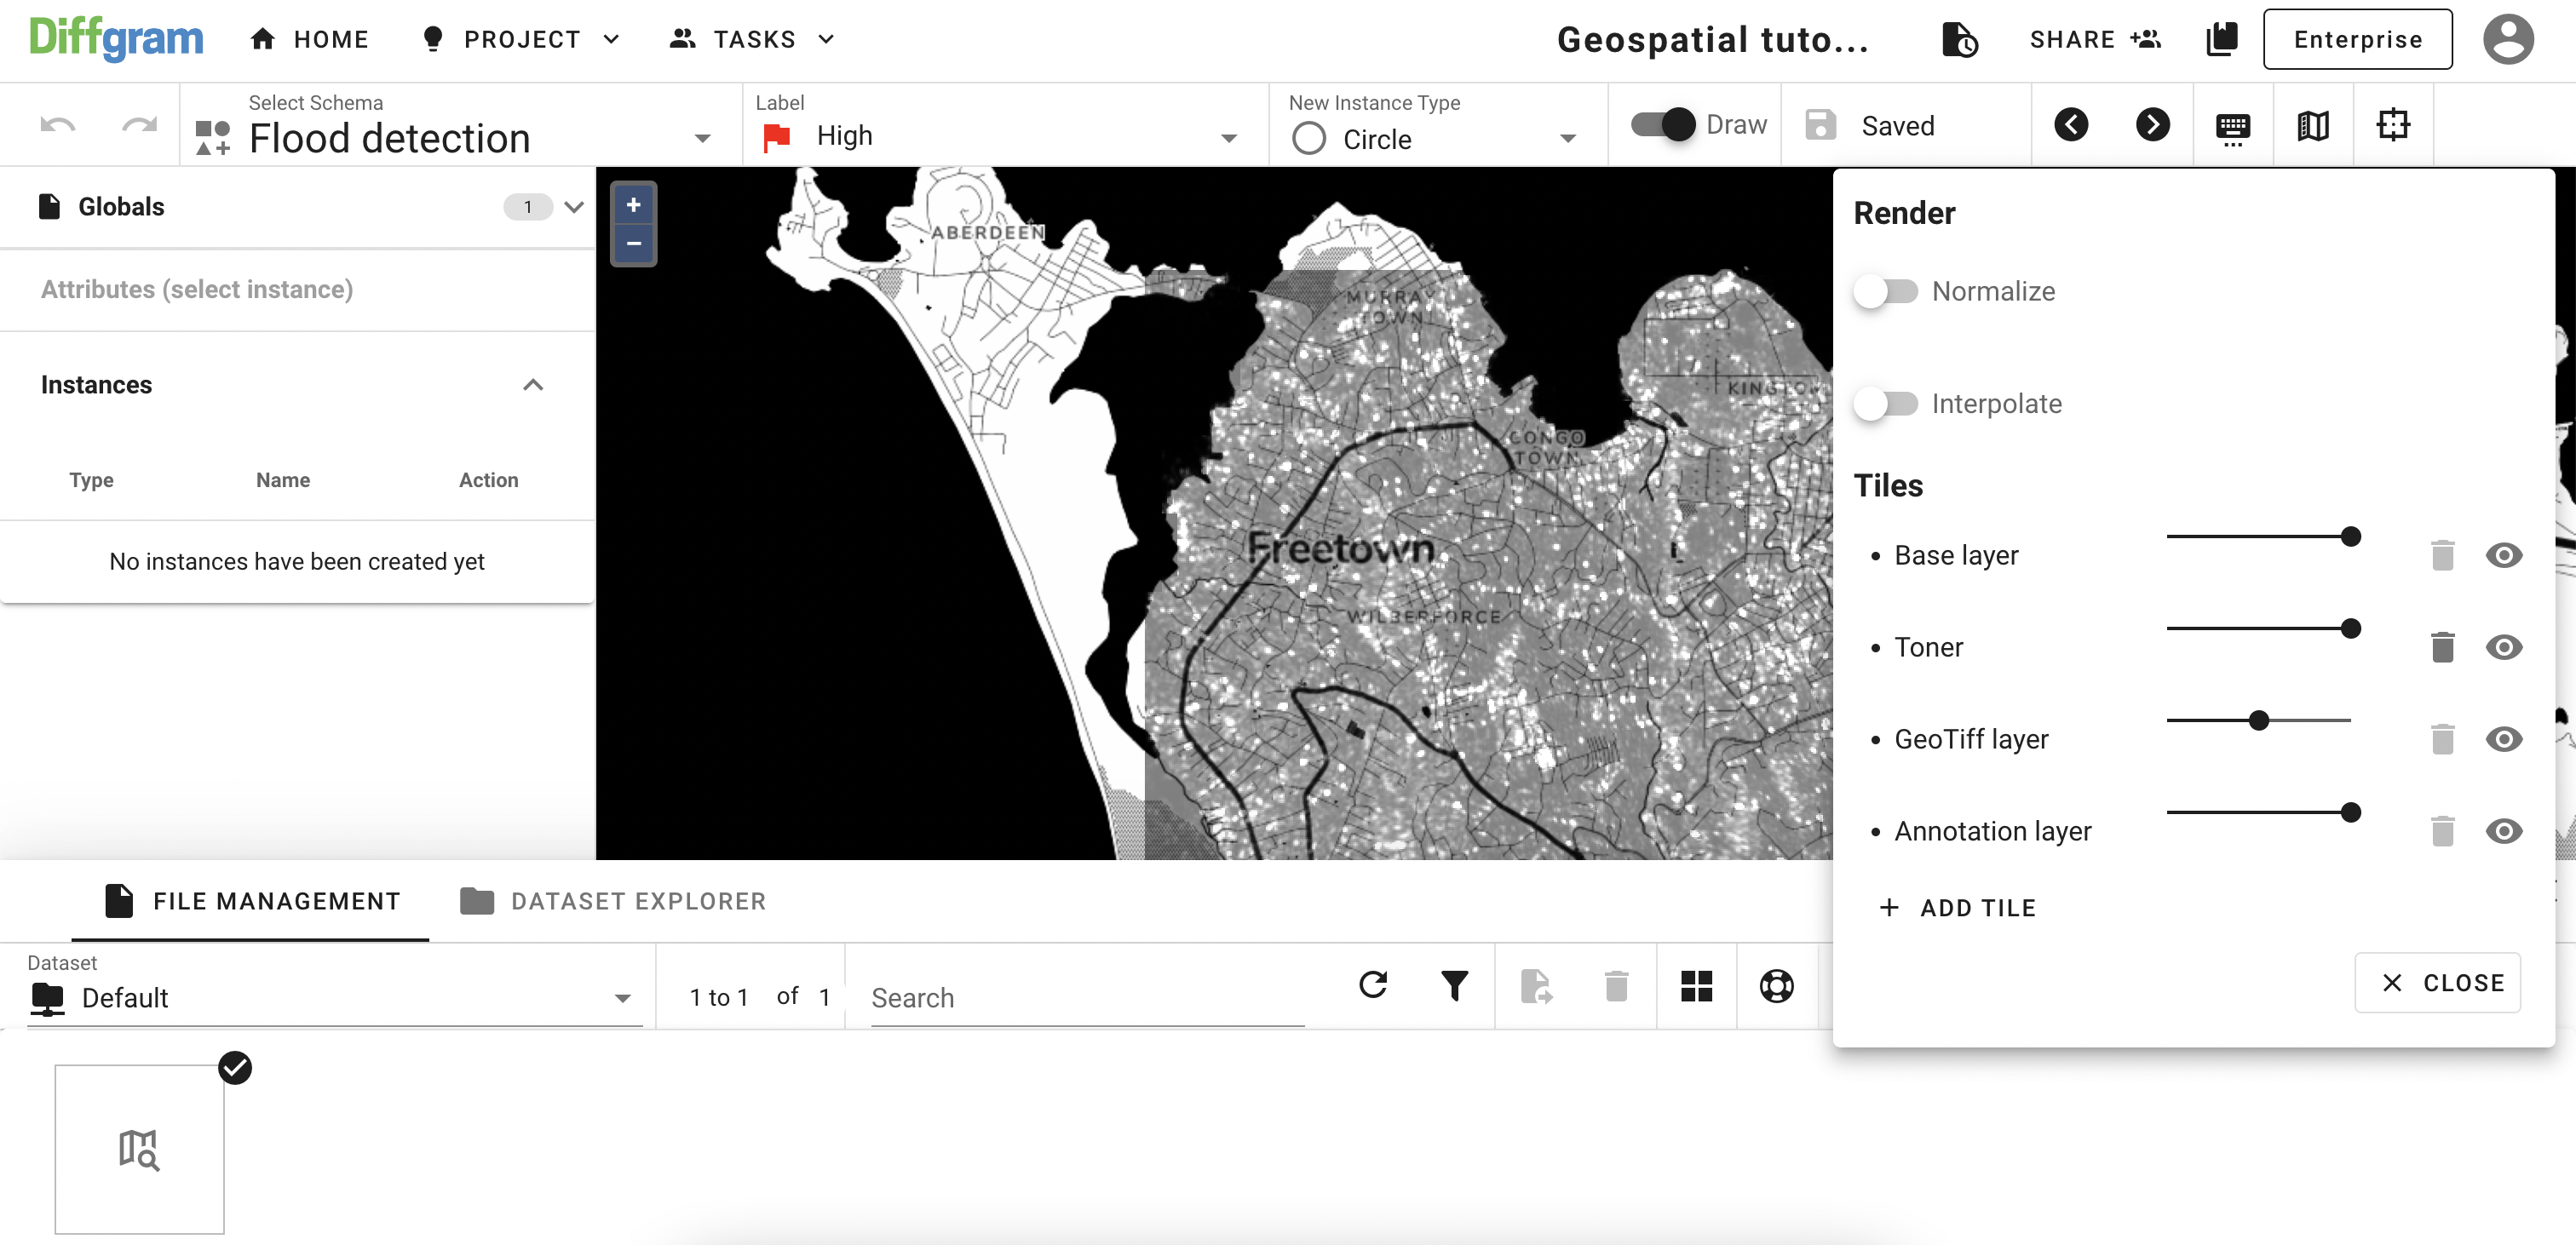
Give the layer a name, past link to the tile, and set an opacity (default is 100%). Click ADD and then your map should look like this (you can note that there is a new layer on the Map Settings):
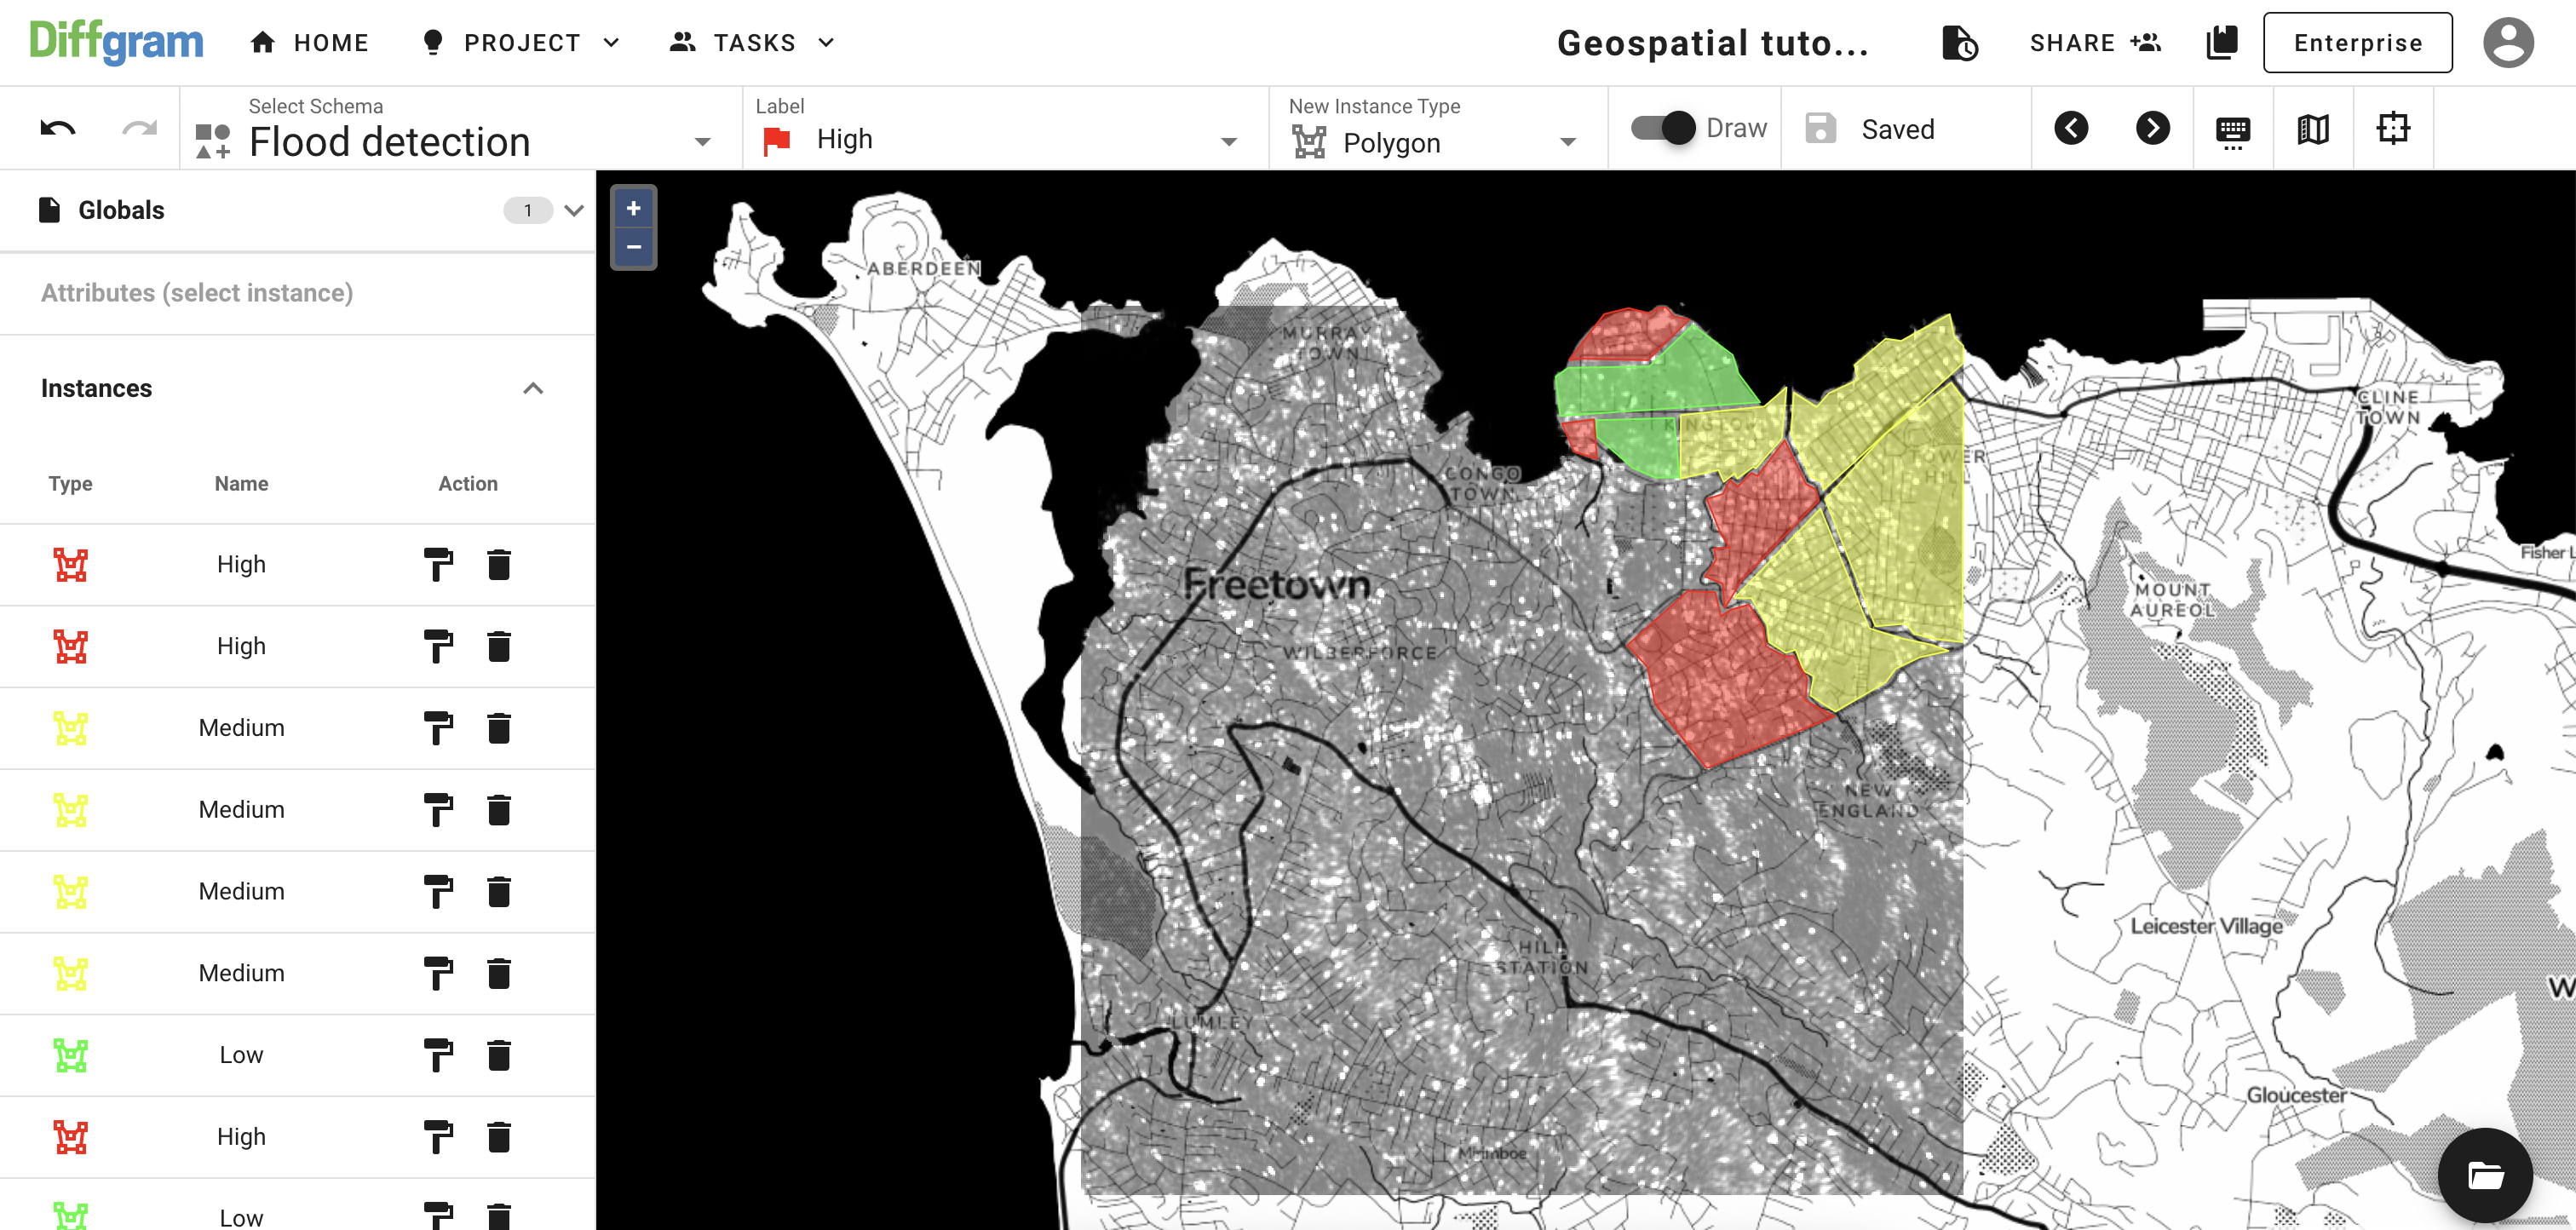
Now everything is set, select Polygon primitive and create some annotations:
To change the applied label, on the list select instance (it will be highlighted on the map as well), click the Change Label Template icon and select a new label:
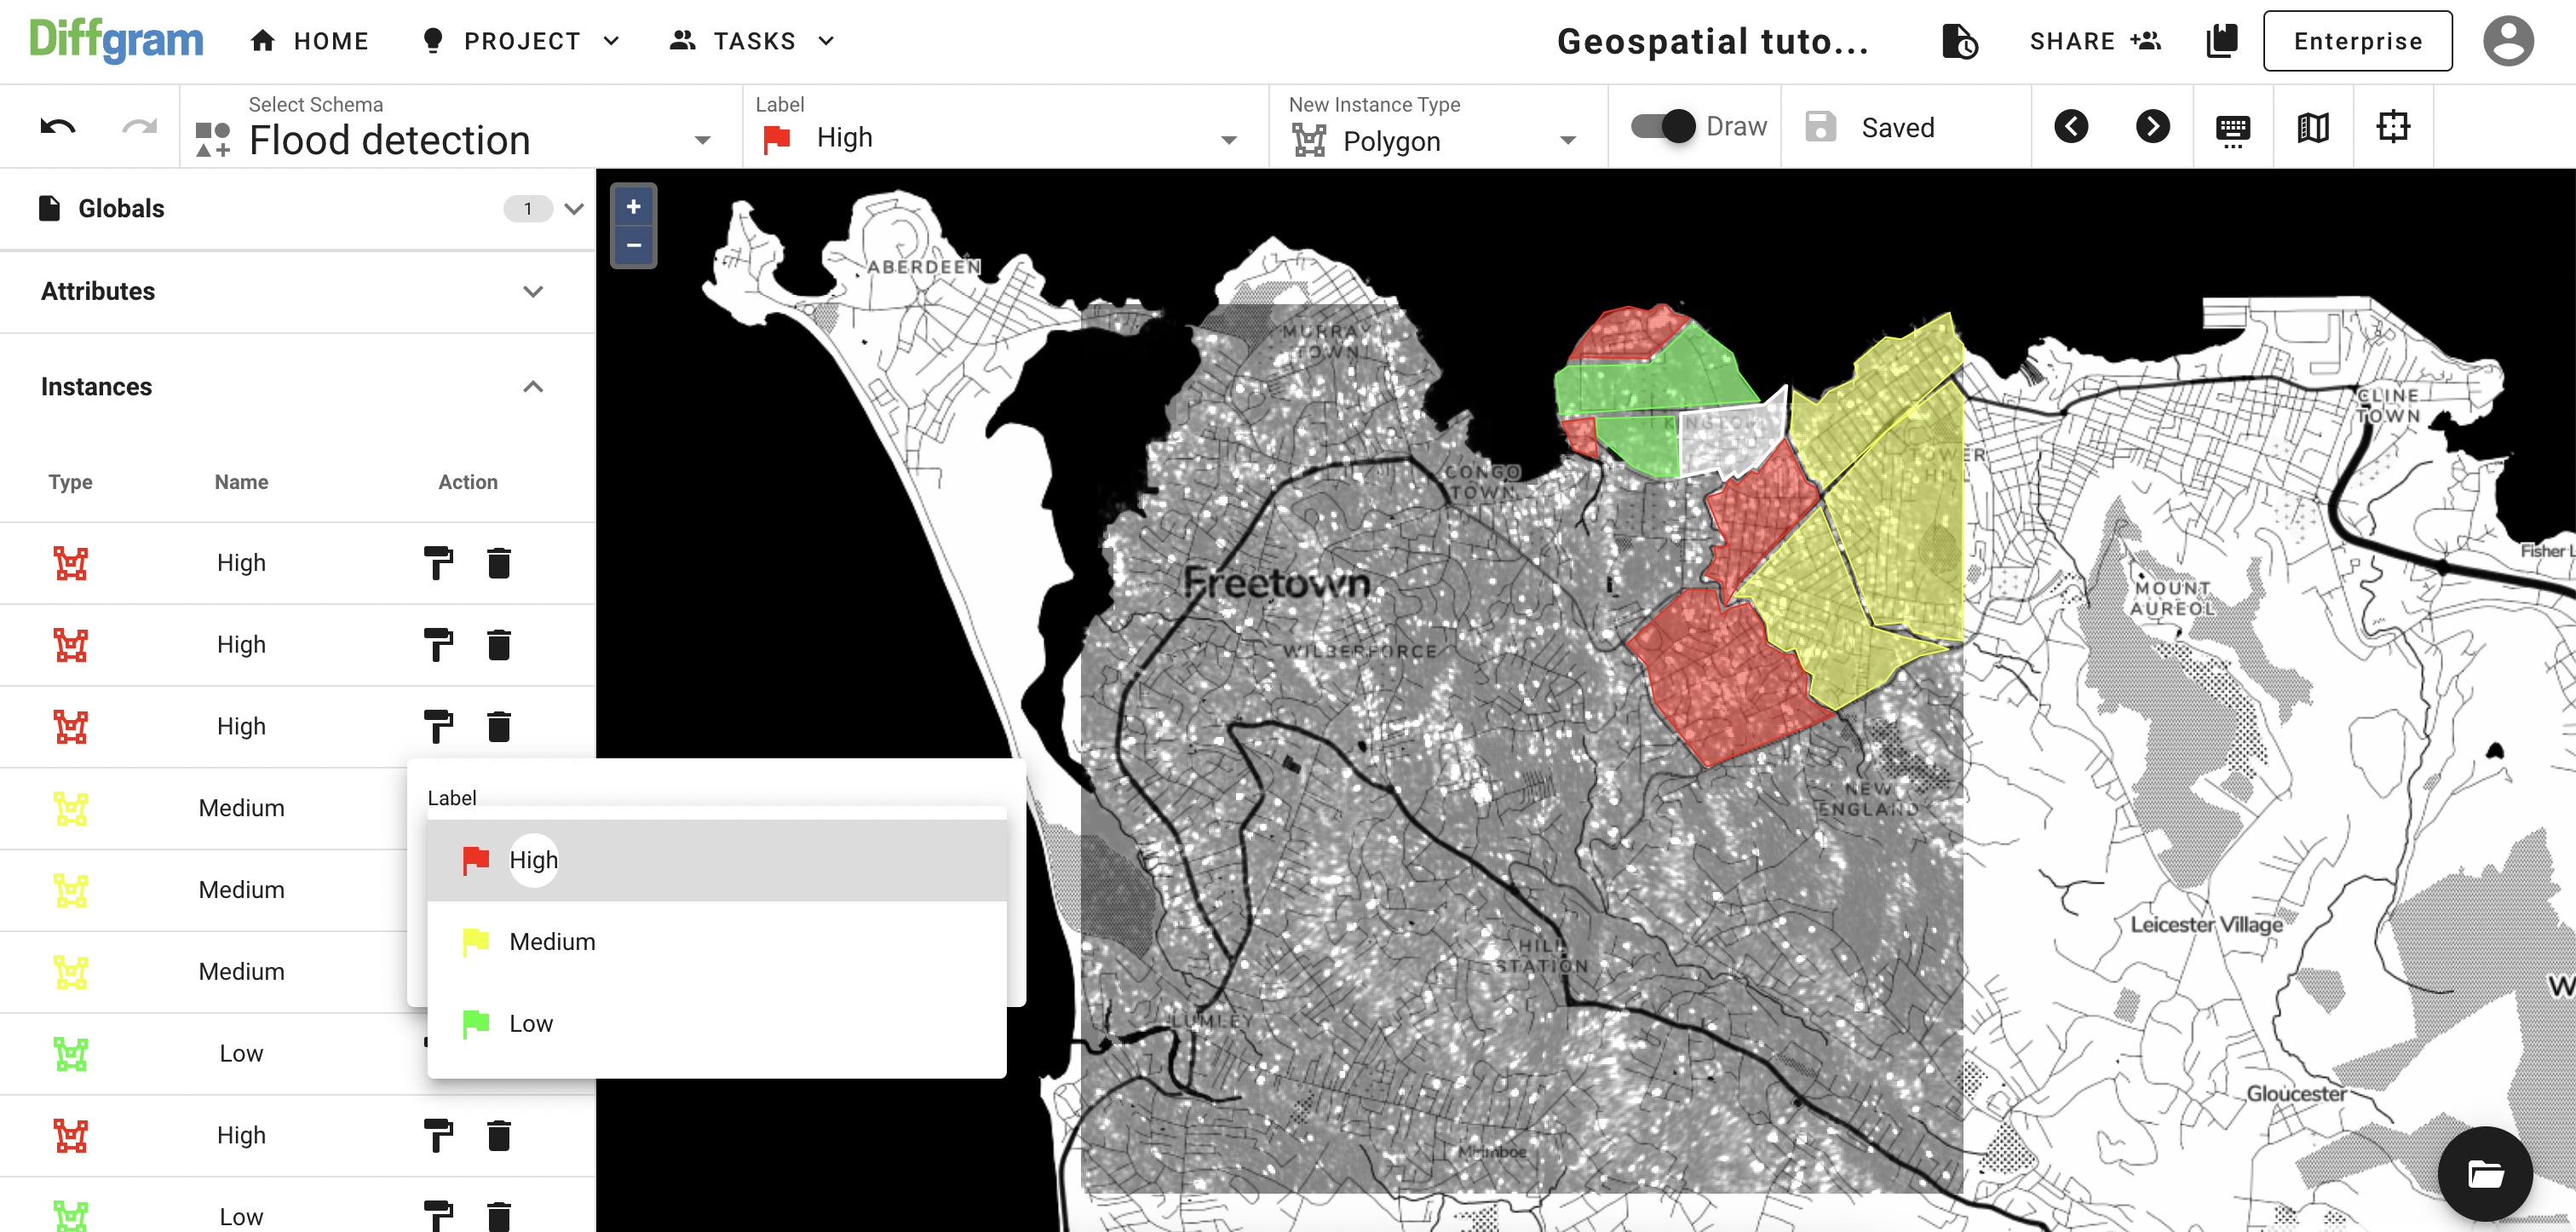
The final result should look like:
Updated about 3 years ago
